Purdue University | CGT 31700 (Themed Attraction Design Planning & Communication)
Individual Detail Project | Halfling Barrel Escape Ride Vehicle Concept
From printable model to themed physical prototype.
A themed ride vehicle prototype exploring how story-driven aesthetics can be layered onto a realistic river rapids ride platform through CAD modification, 3D printing, and physical model finishing.

Project Overview:
For this project, I focused on a single artifact from our larger Halfling Barrel Escape attraction concept: the ride vehicle itself.
Rather than redesigning an entire rapids attraction system, I wanted to explore how a specific component could be pushed further as a portfolio-quality case study. The result is a miniature themed ride vehicle prototype that reimagines a standard river rapids ride envelope as a barrel-inspired river craft, while still preserving the functional silhouette of a real rapids ride.
This project became an exercise in ride vehicle theming, practical fabrication, and design communication – moving from downloaded source files to CAD modification, 3D printing, physical finishing, budgeting, and project planning.
Design Goal:
The goal was to create a more distinctive ride vehicle that felt integrated into the attraction’s visual story rather than reading as a generic raft.
Because real rapids vehicles rely on a large floating bumper ring and a circular seating arrangement, I chose not to eliminate those functional cues. Instead, I used them as a constraint. The challenge was to make the raft feel more immersive and themed without breaking the realism of how the vehicle would actually need to operate.
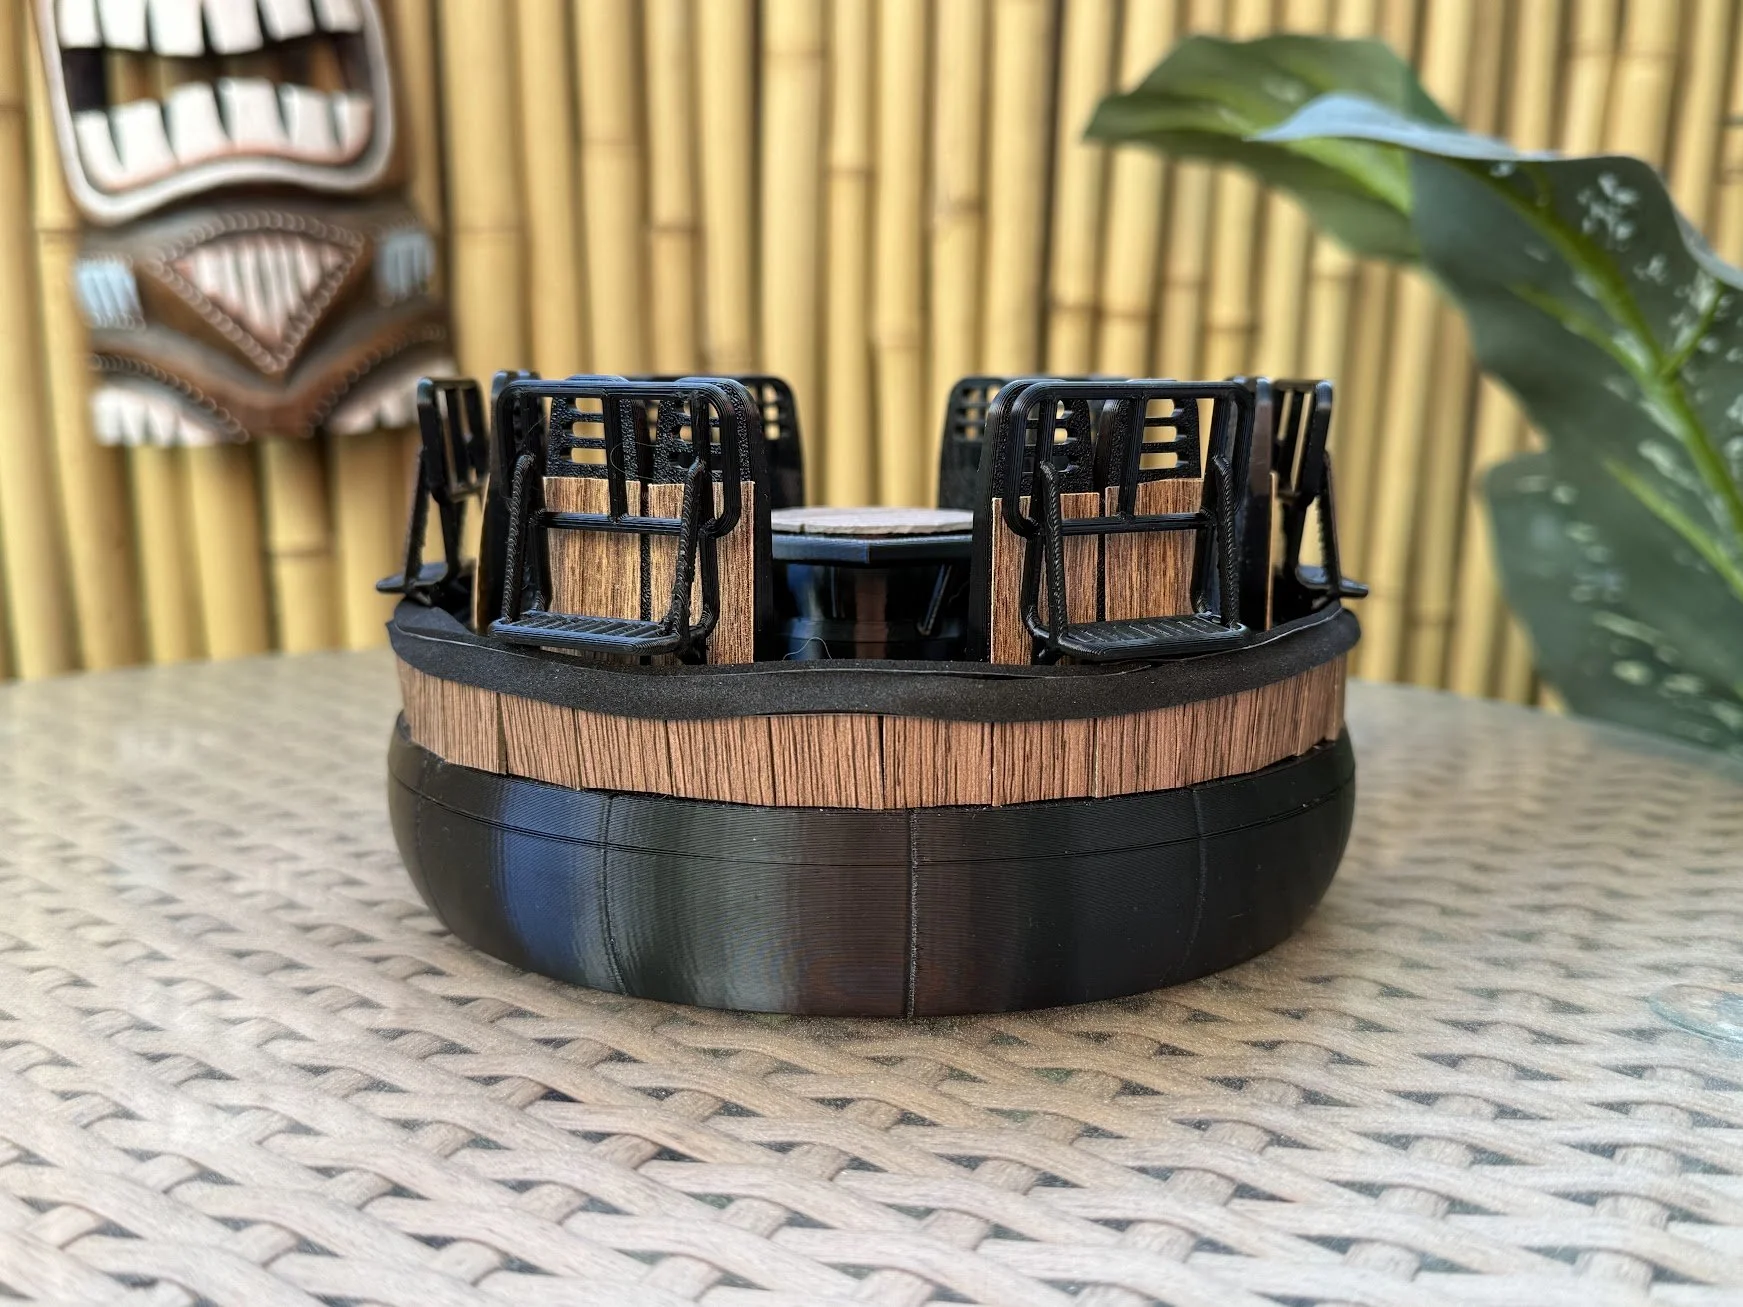
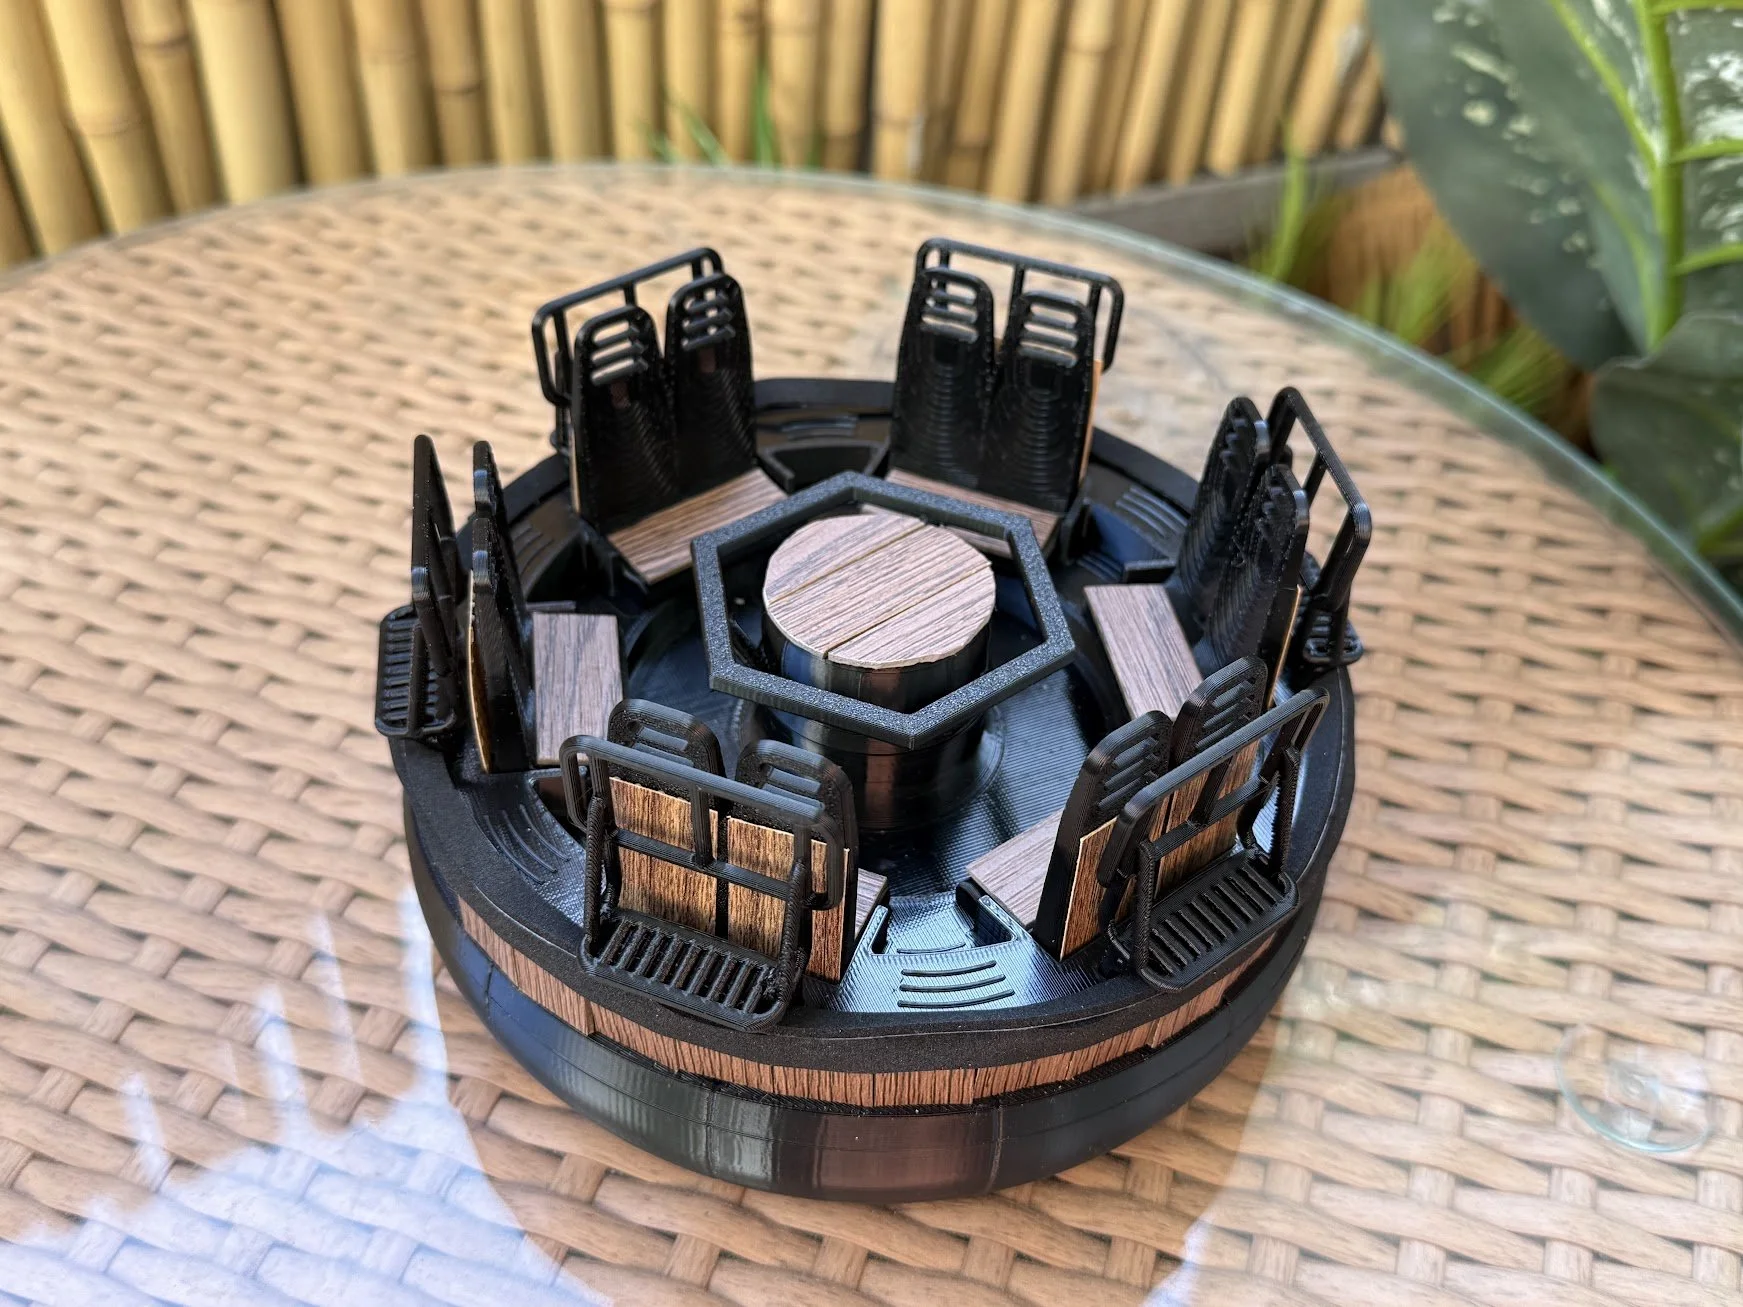
The final concept uses barrel and timber references—wood plank textures, cladding, and a more intentional central assembly—to give the vehicle a stronger themed identity while retaining the float ring, seat arrangement, and rotational center expected in a whitewater raft ride.
Process
Starting Point: Source Model and Constraints
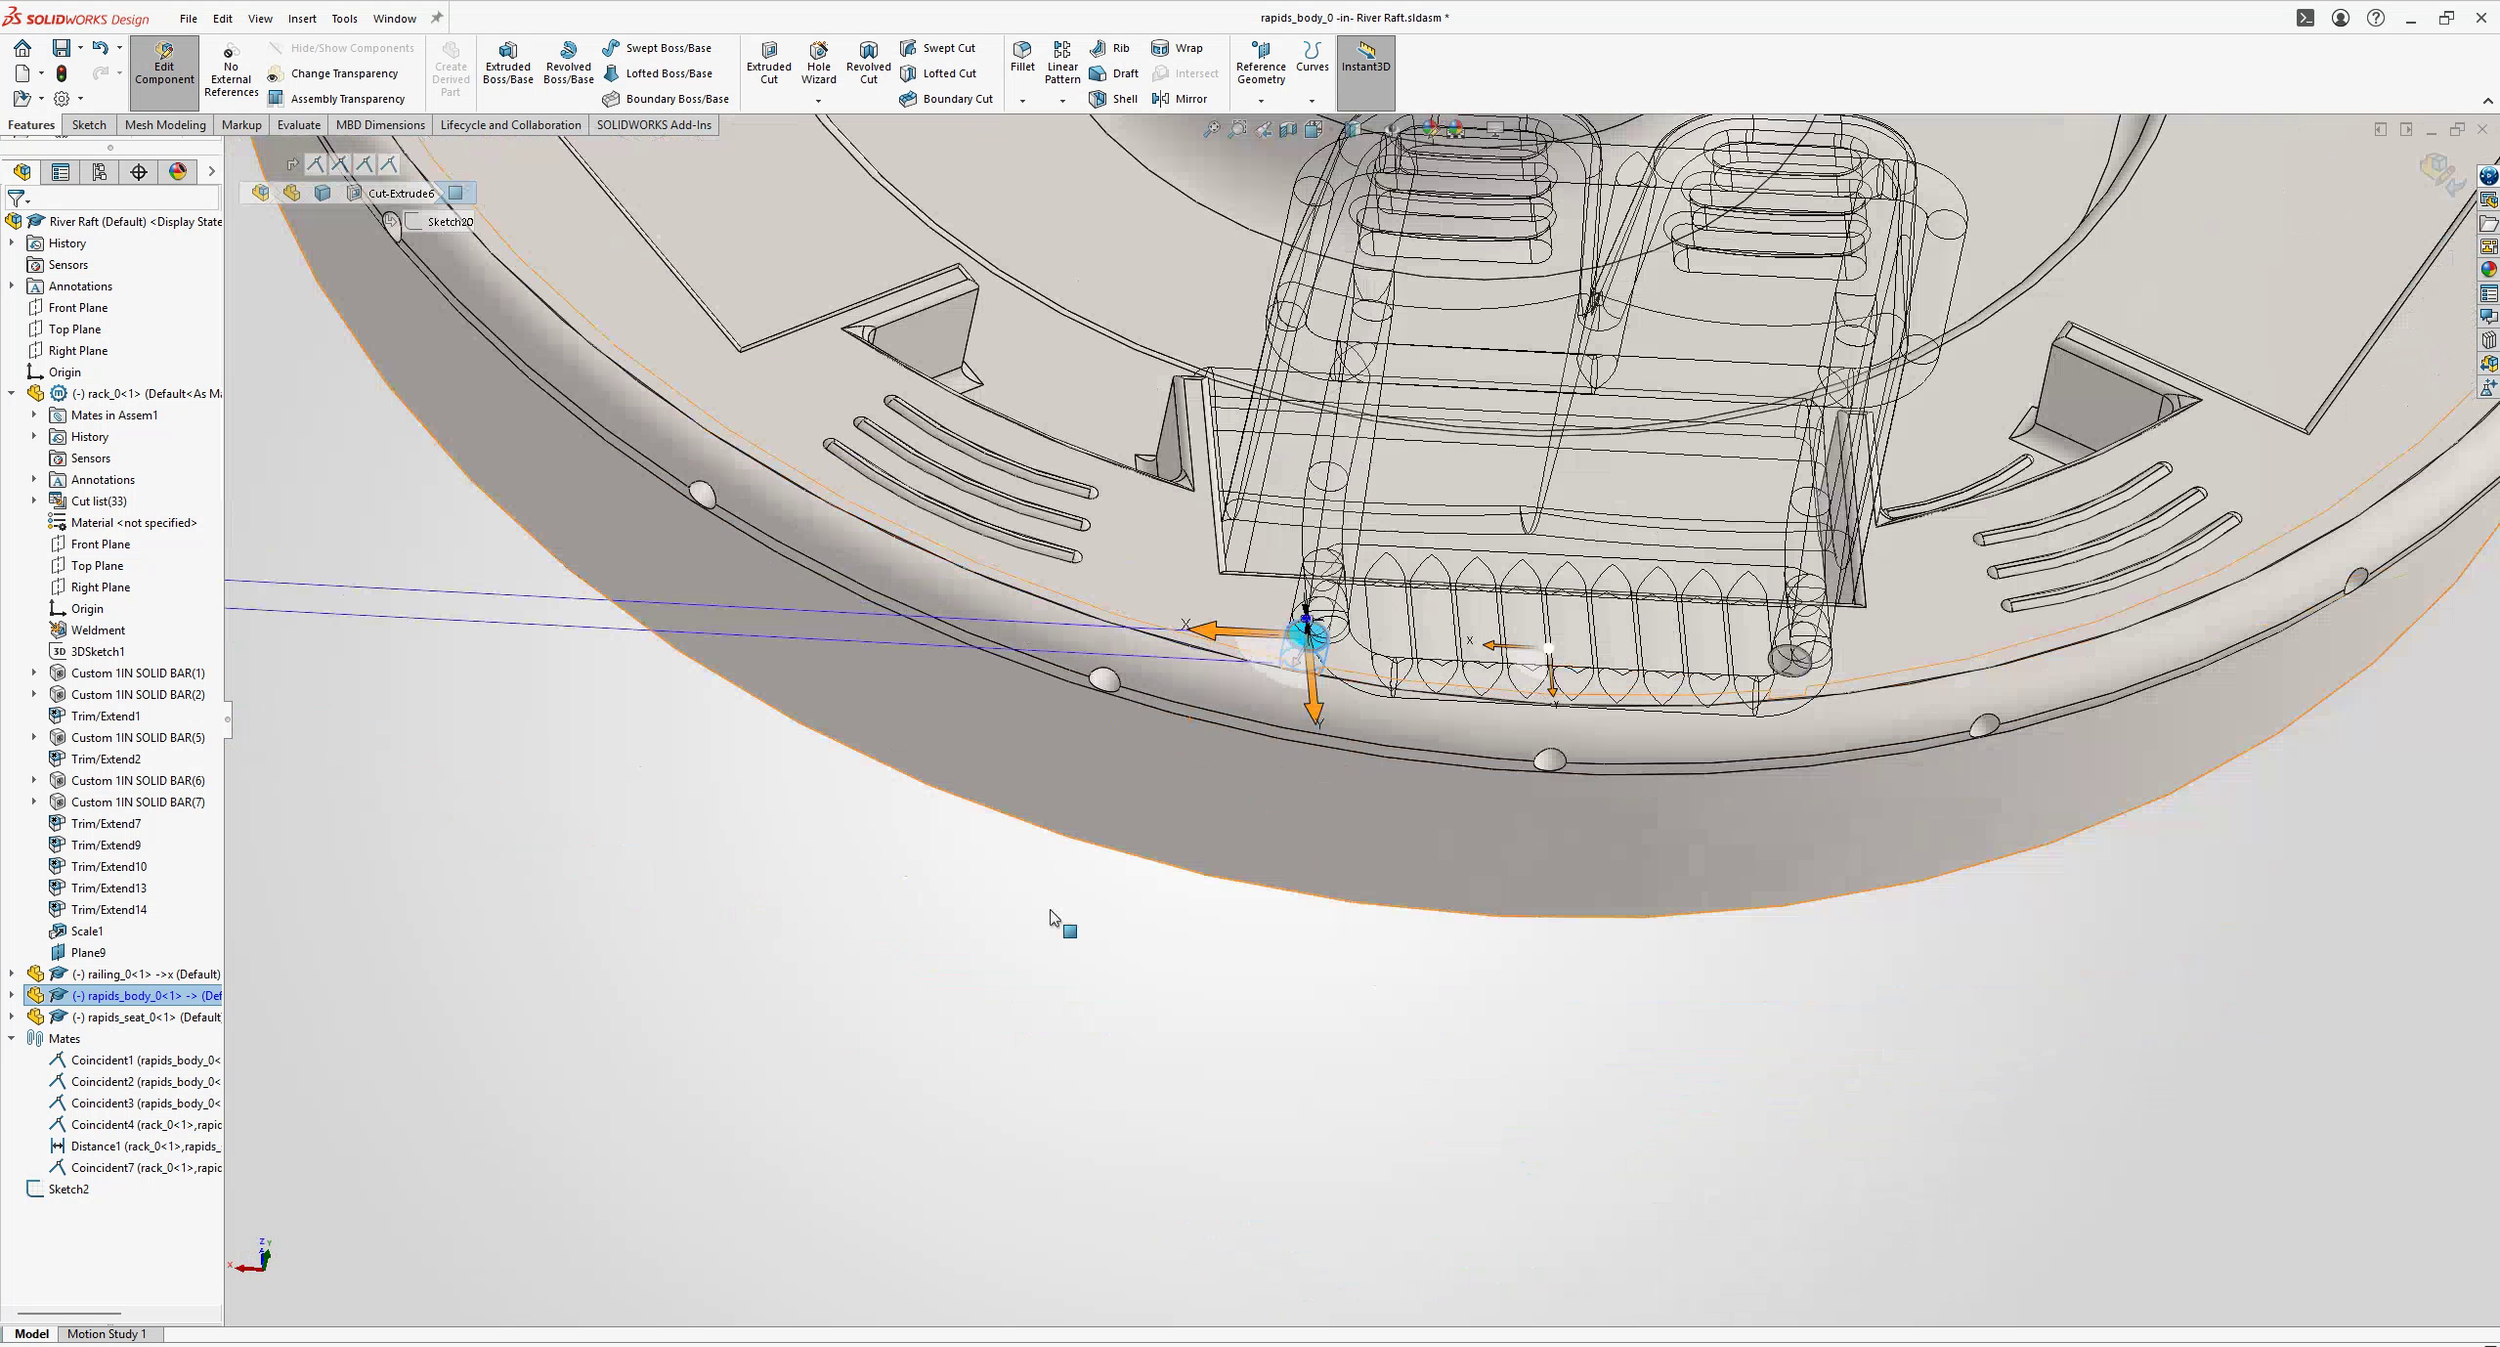
The project began with a user-shared 3D model downloaded from Printables.com, a repository for community-created printable assets.
The source files were provided in SolidWorks format, which made them editable, but the model was not production-ready for printing. The assembly included individual components and an overall assembled file, but many parts were floating or disconnected and could not be printed as-is.
This meant the first phase of the project was less about styling and more about making the model structurally viable.
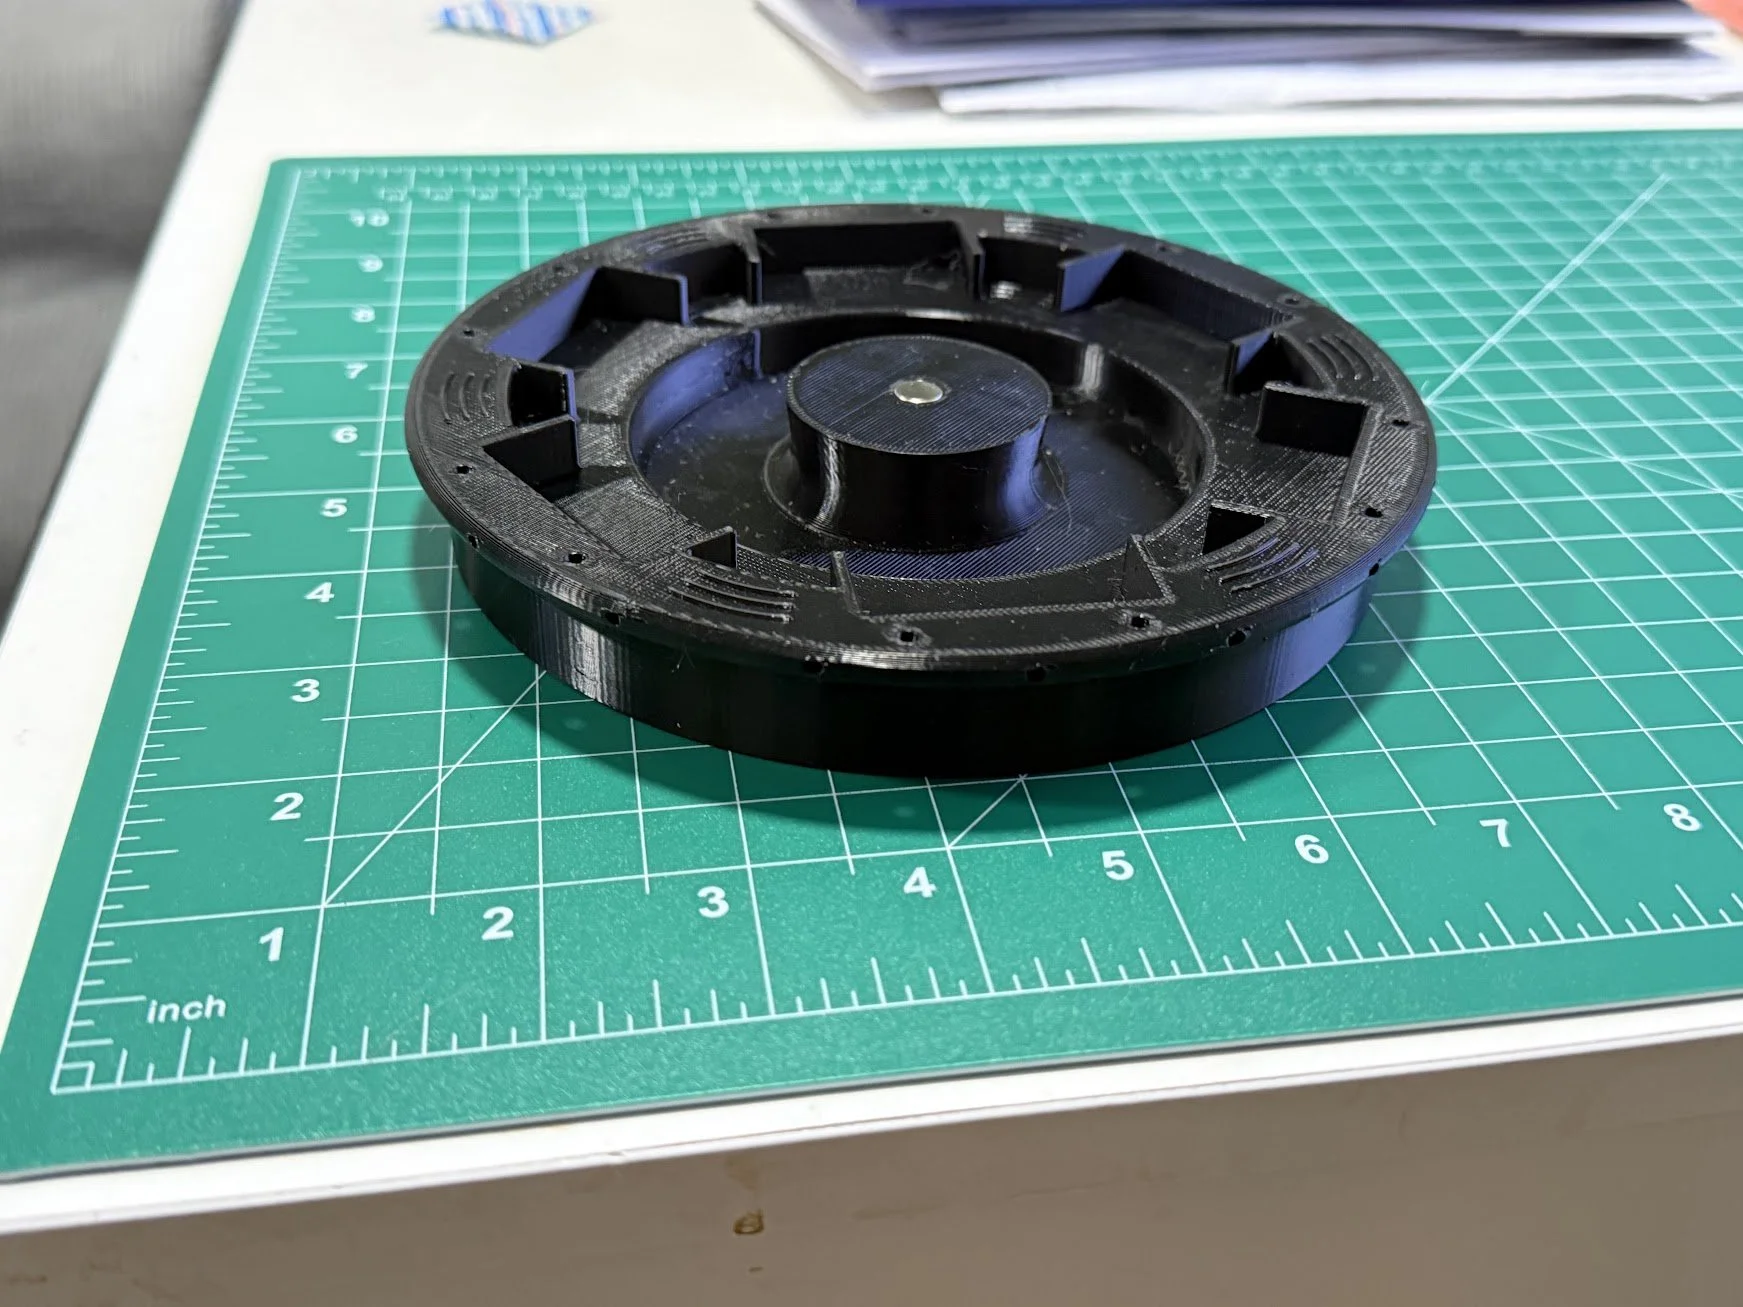
Initial issues identified:
Components were visually assembled but not physically connected
Several parts would require heavy supports and poor post-processing cleanup
Some assemblies had no secure attachment method
The default form read more like a generic raft than a themed vehicle
CAD Modifications in SolidWorks
Once I reviewed the original files, I rebuilt and modified several key areas in SolidWorks to improve printability, structural integrity, and thematic cohesion.
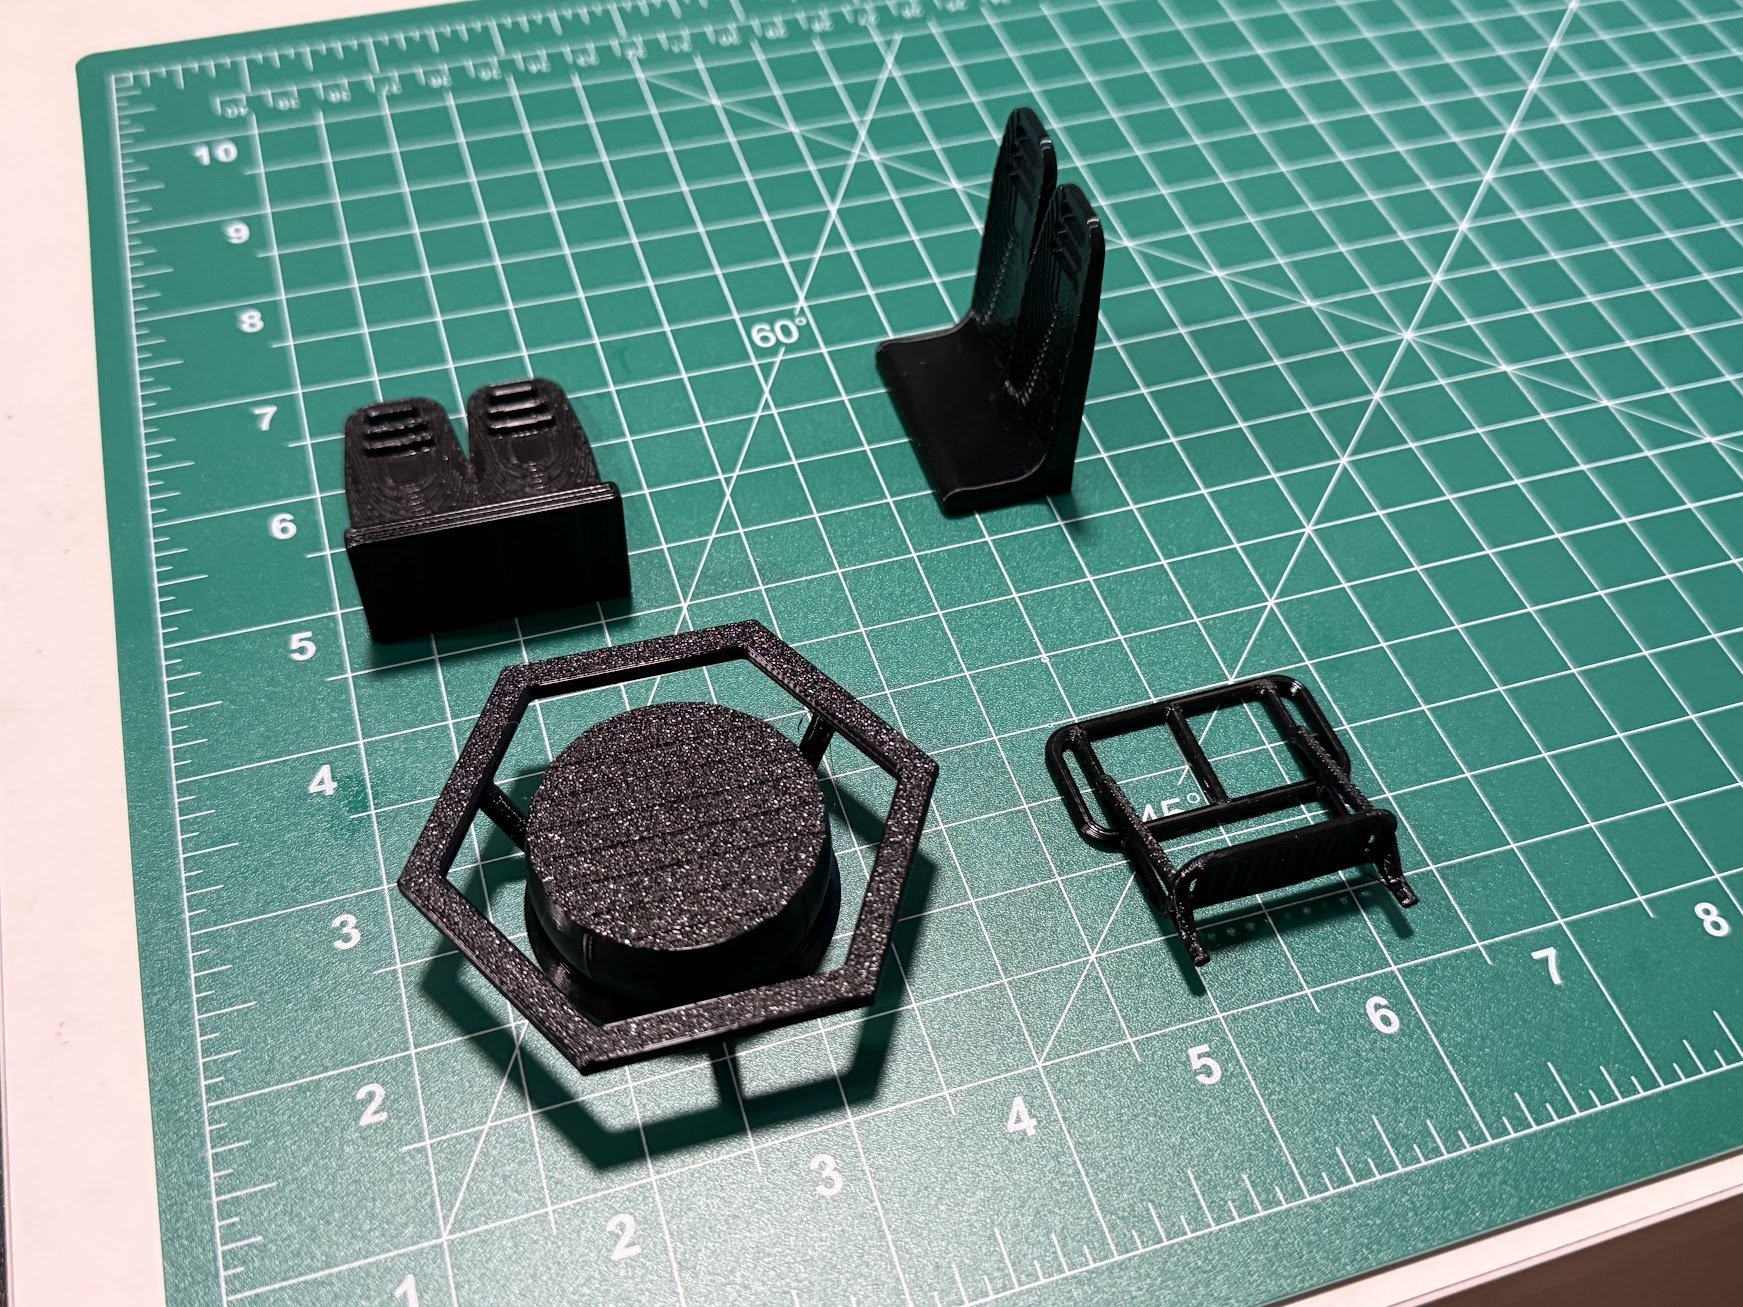
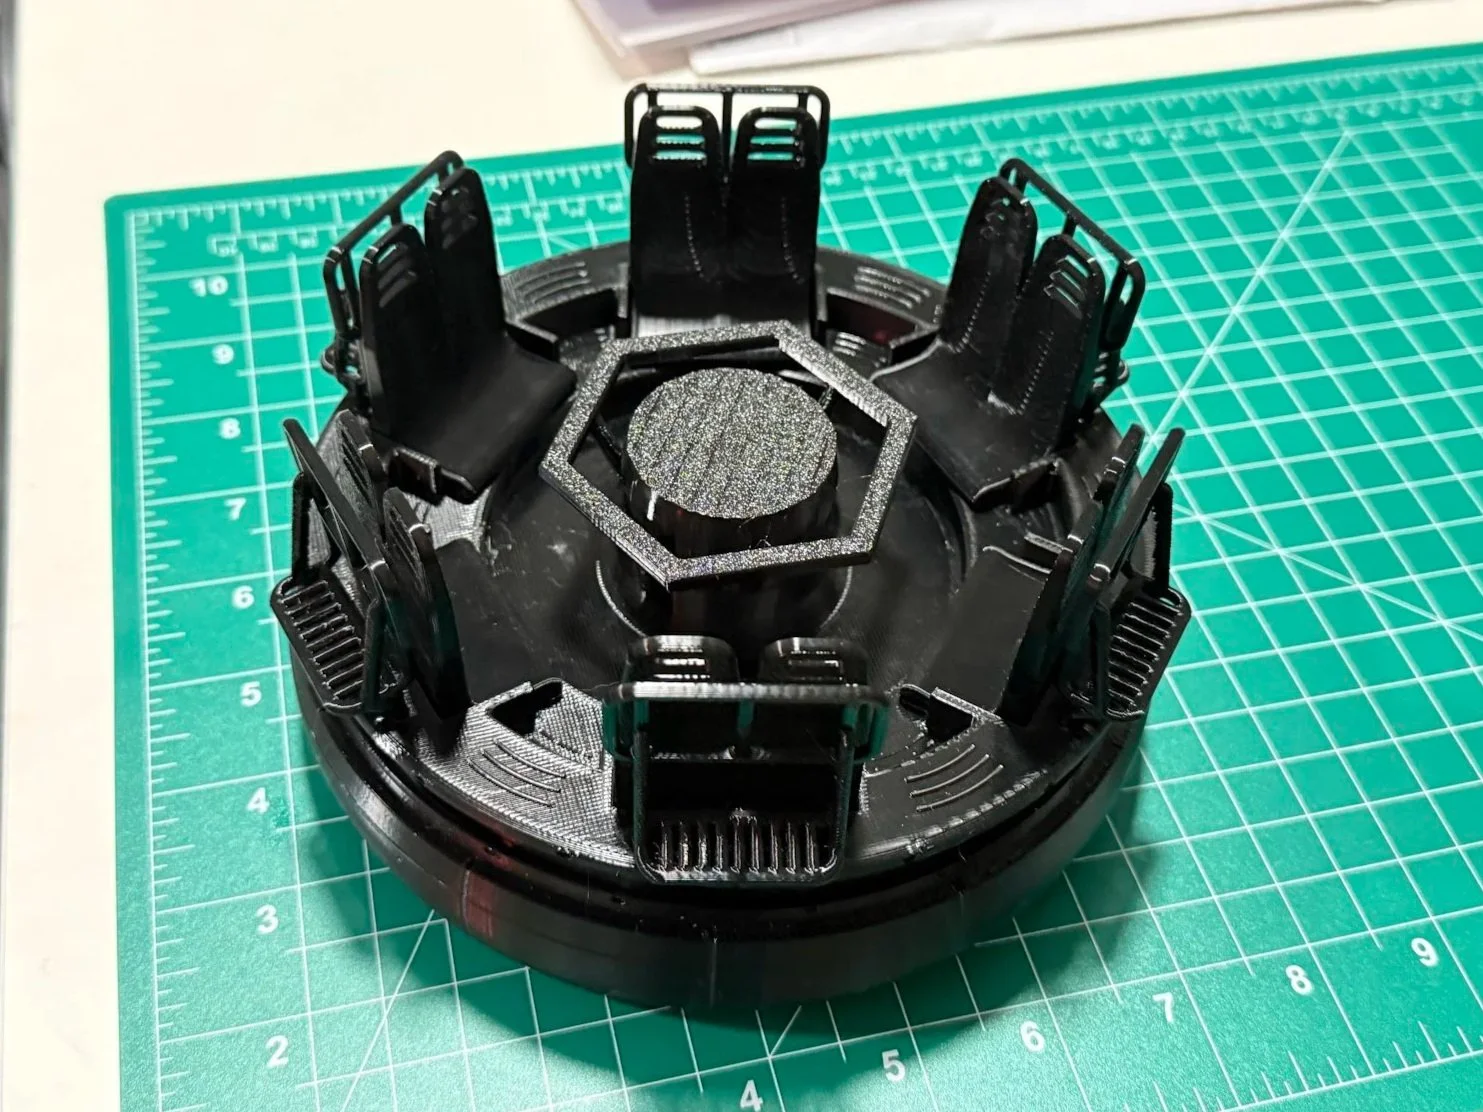
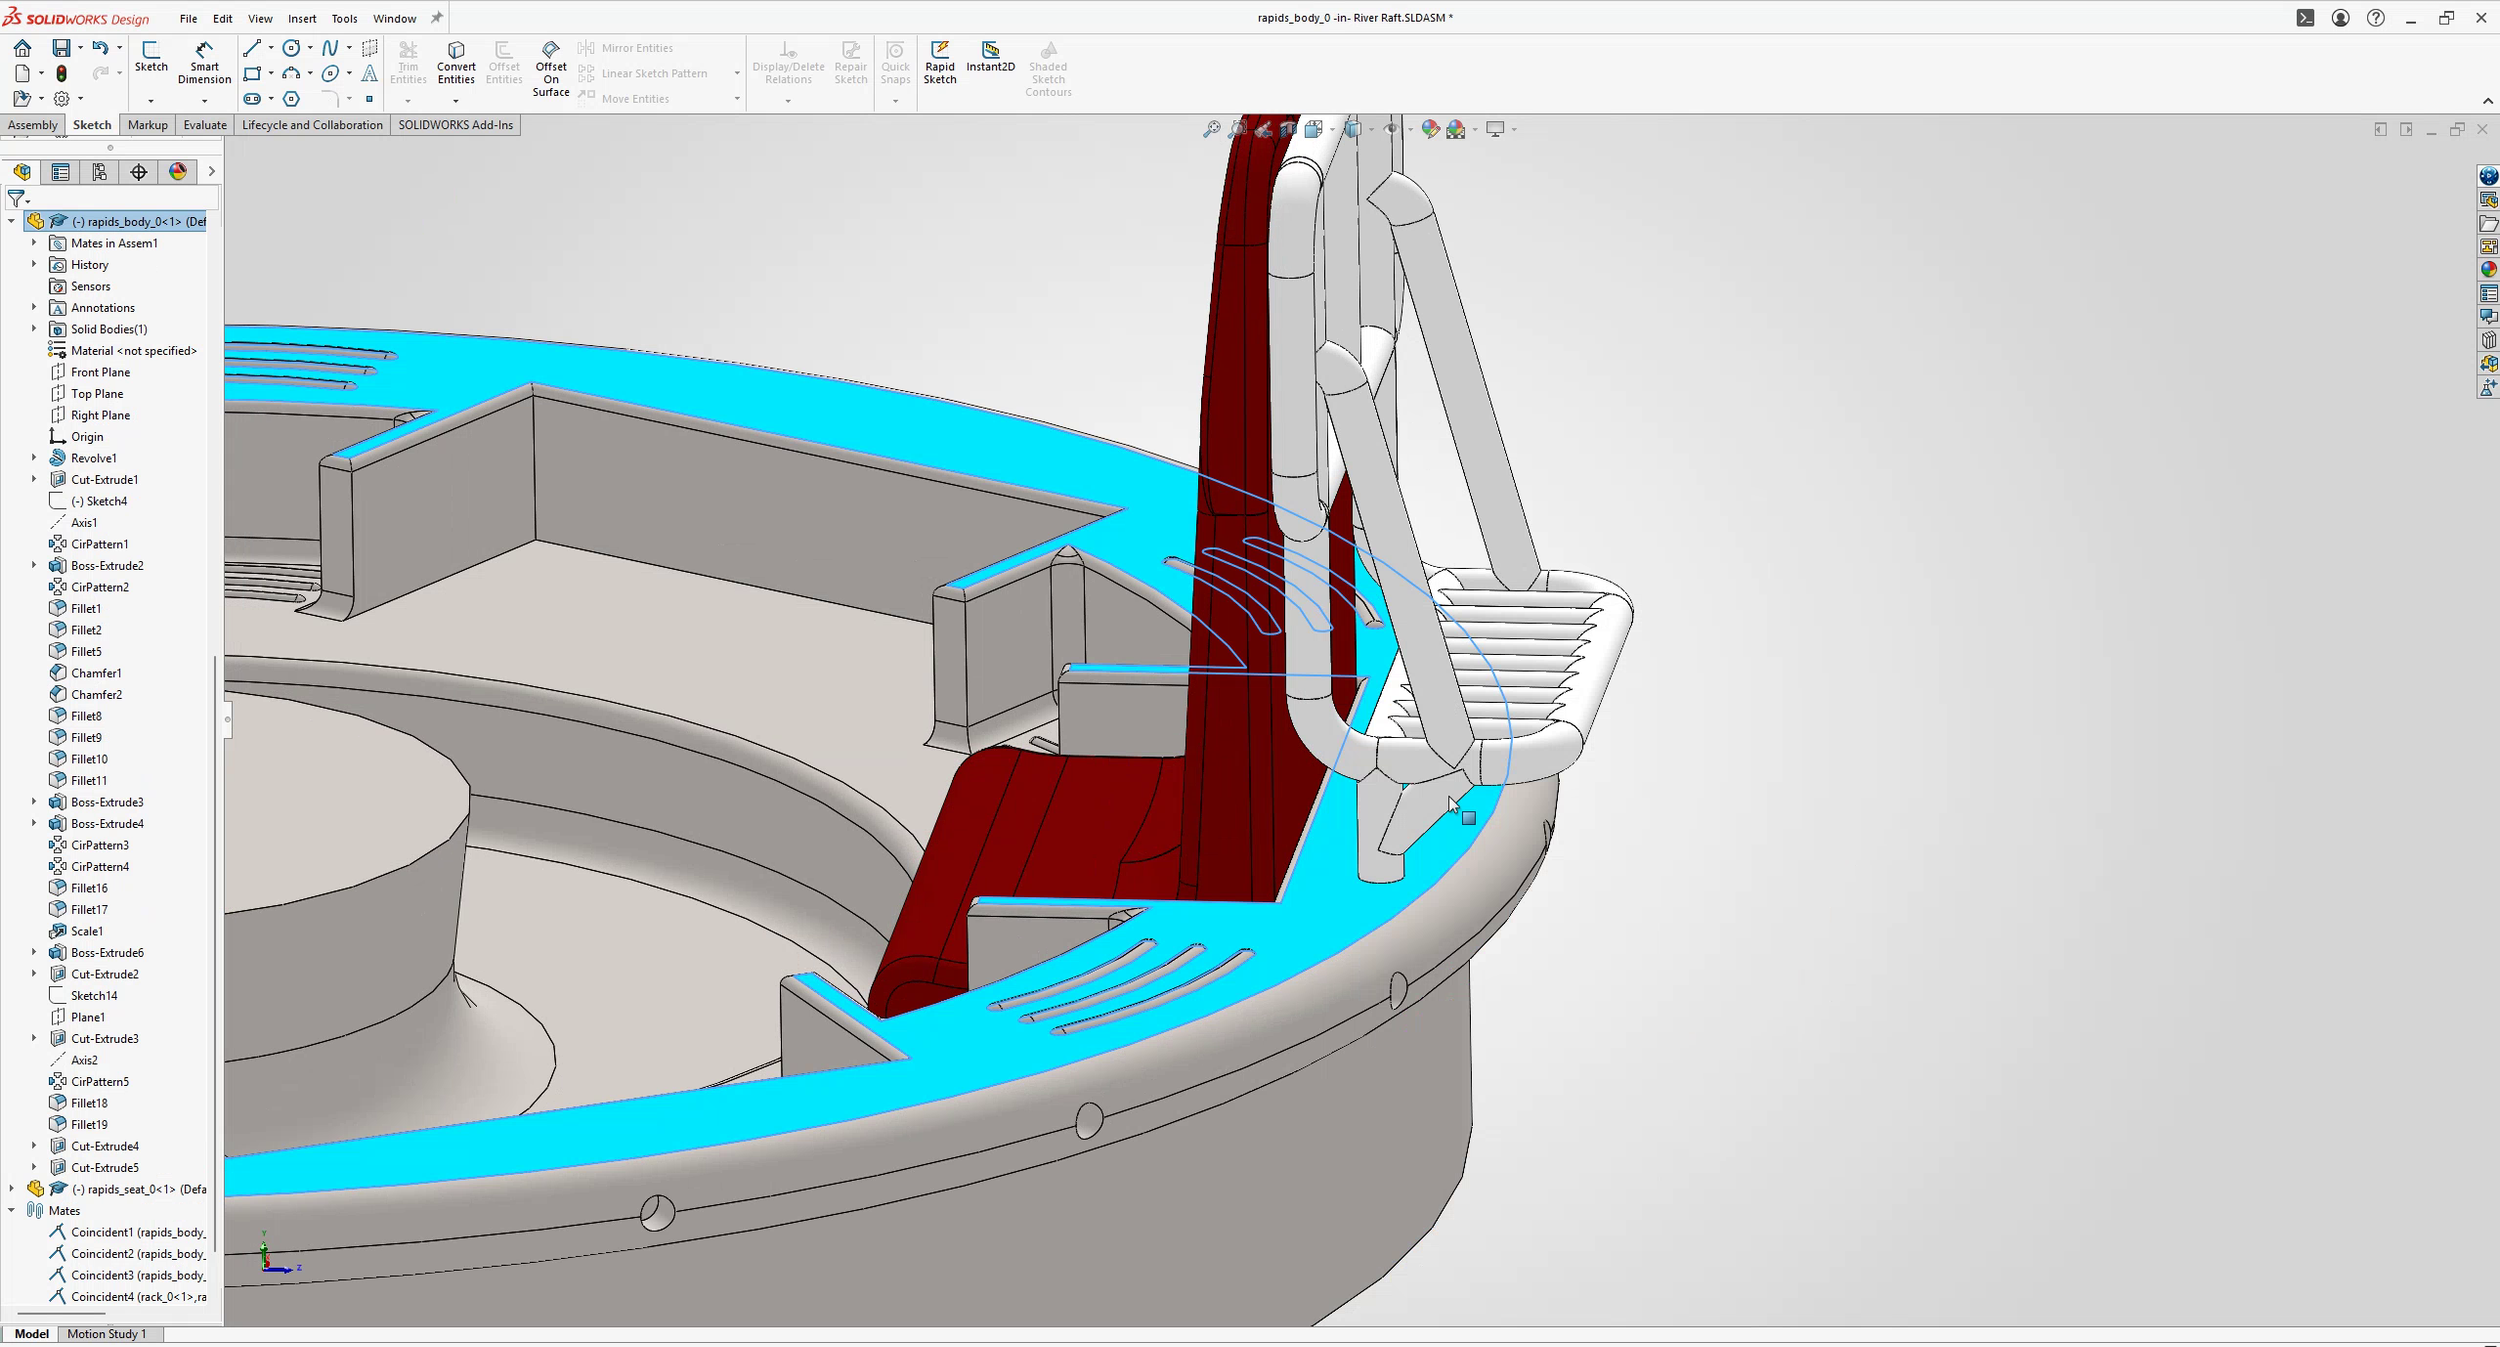
1. Seat Railing Integration
The original seat railings did not securely connect into the raft insert. To solve this, I extended the railing posts downward so they intersected with the insert and could physically anchor into the body.
This turned a visually placed component into a printable, mechanically connected one.
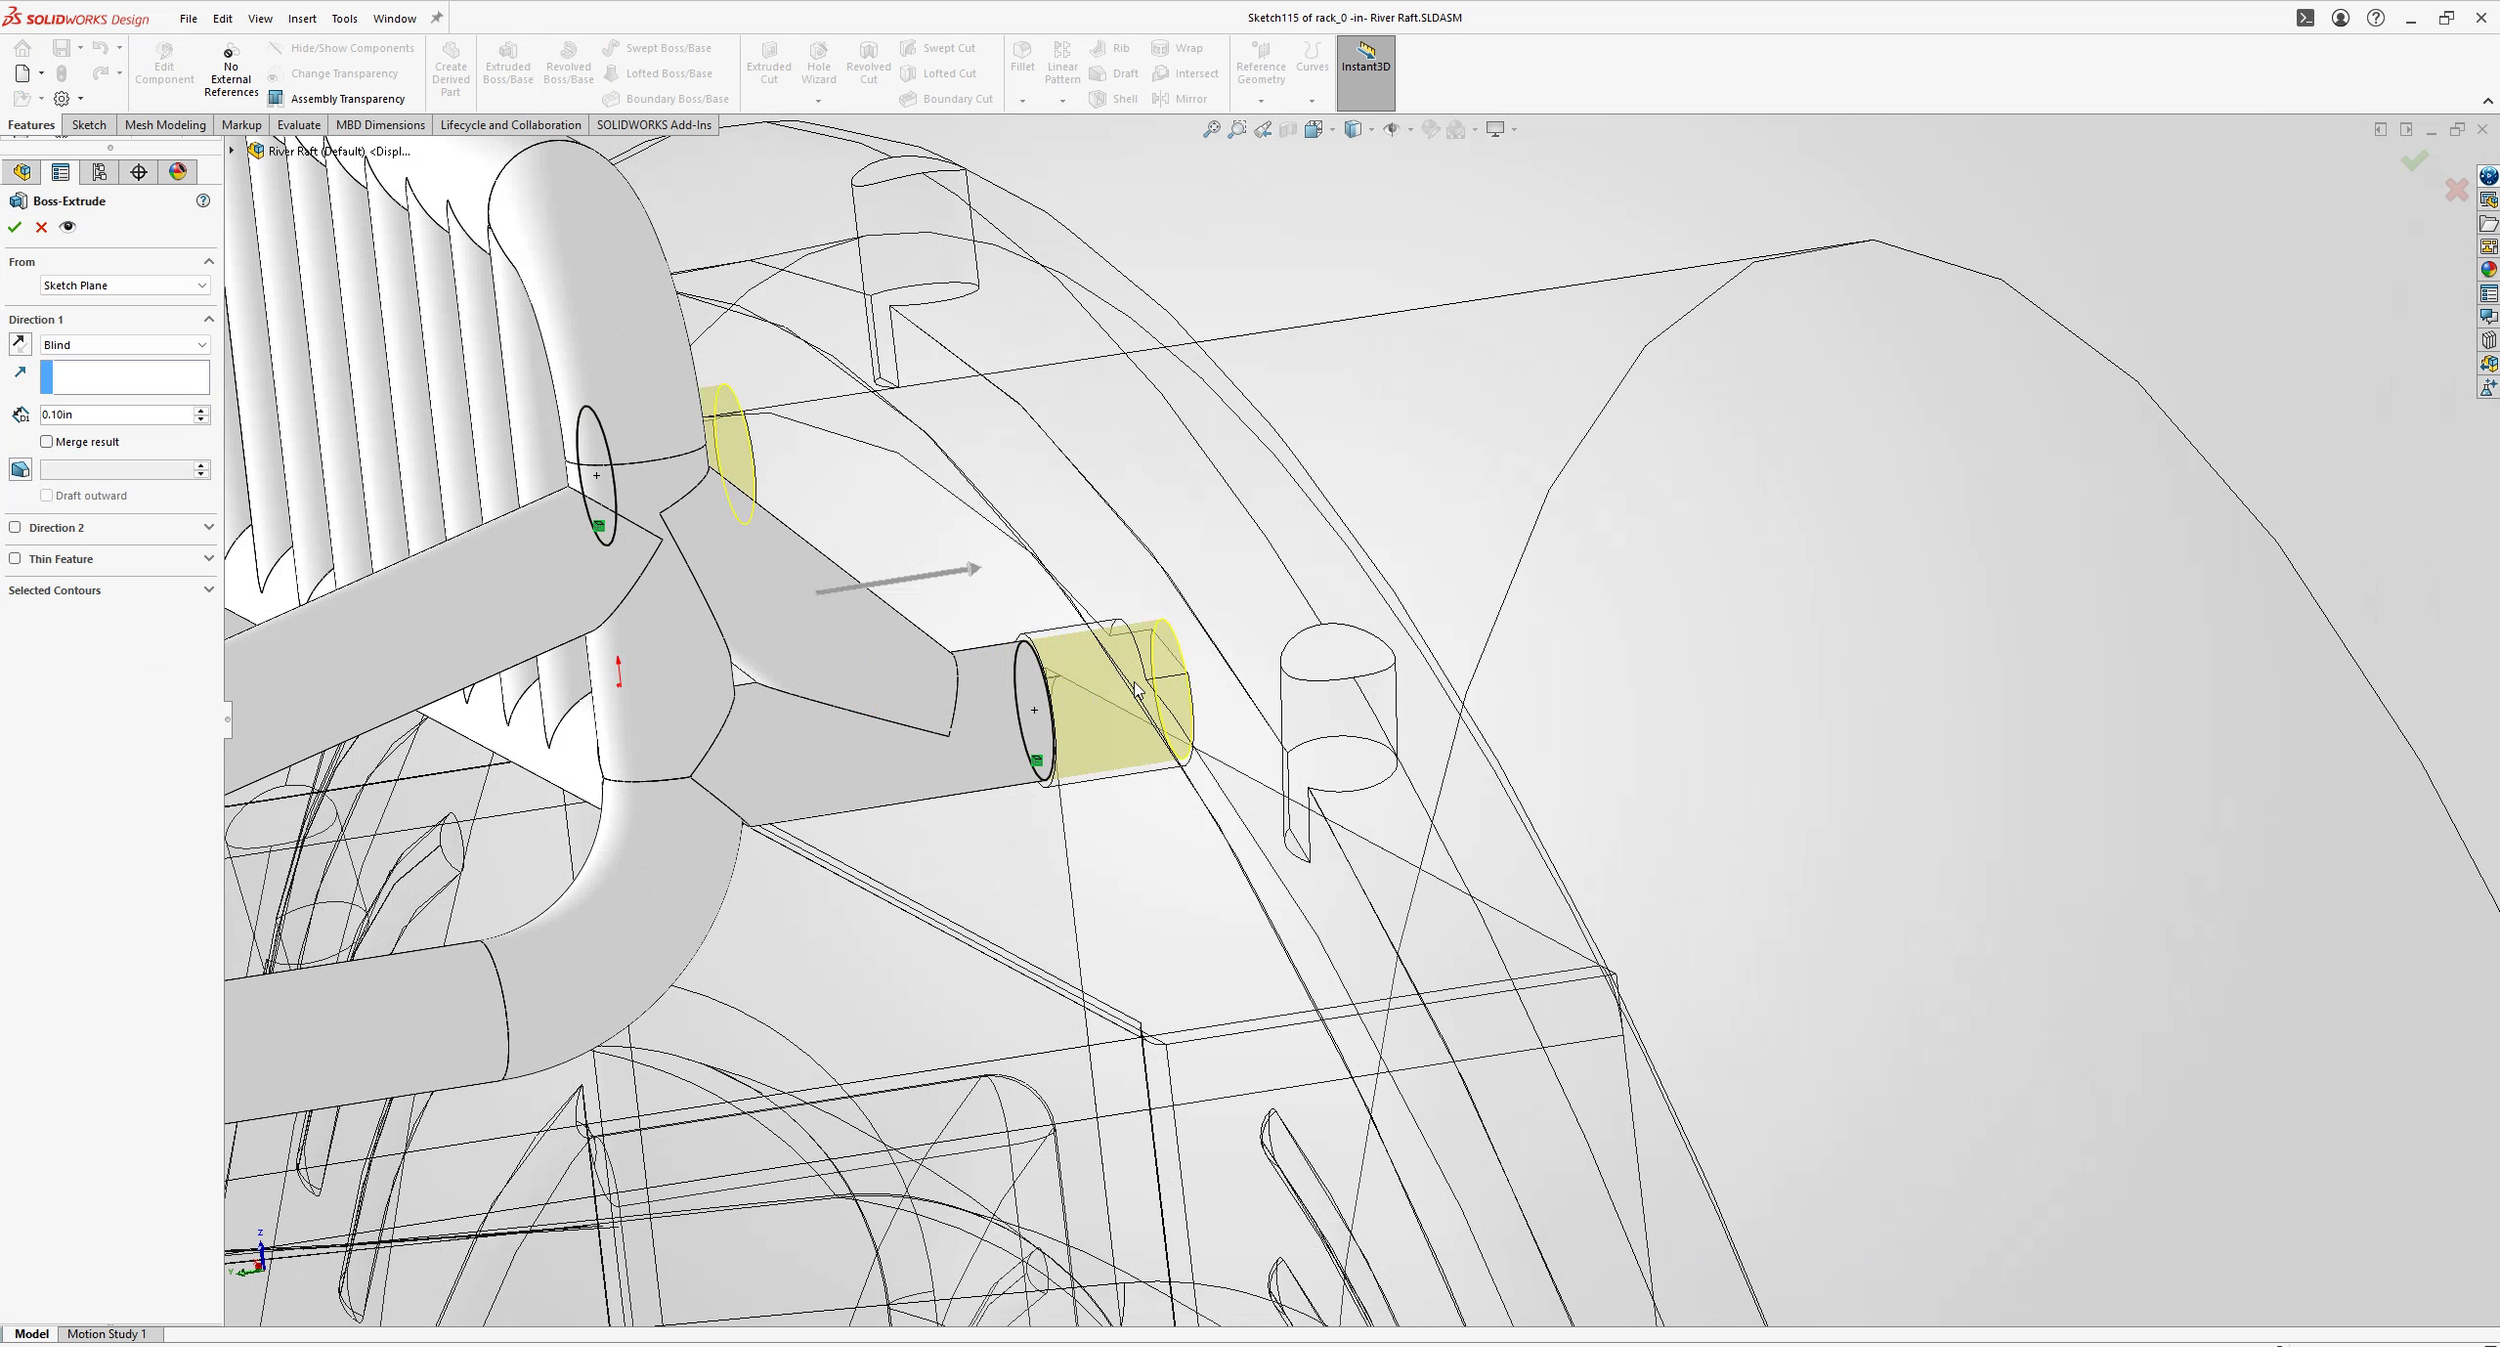
2. Center Handhold Rework
The center handhold assembly originally had a recessed underside that would have required supports, leading to a rough surface finish after removal.
To improve print quality, the following modifications were needed:
Extended the center post to match the height of the surrounding railings
Reoriented the geometry to support support-free printing where possible
Added a magnet-based connection so the center piece could snap into place while still rotating
3. Barrel-Inspired Theming
To push the design beyond the base raft:
Introduced plank-like linework into the central column
Slimmed and refined portions of the outer float visually (to make it less donut-like)
Planned the raft body around a later physical cladding pass using thin wood slats
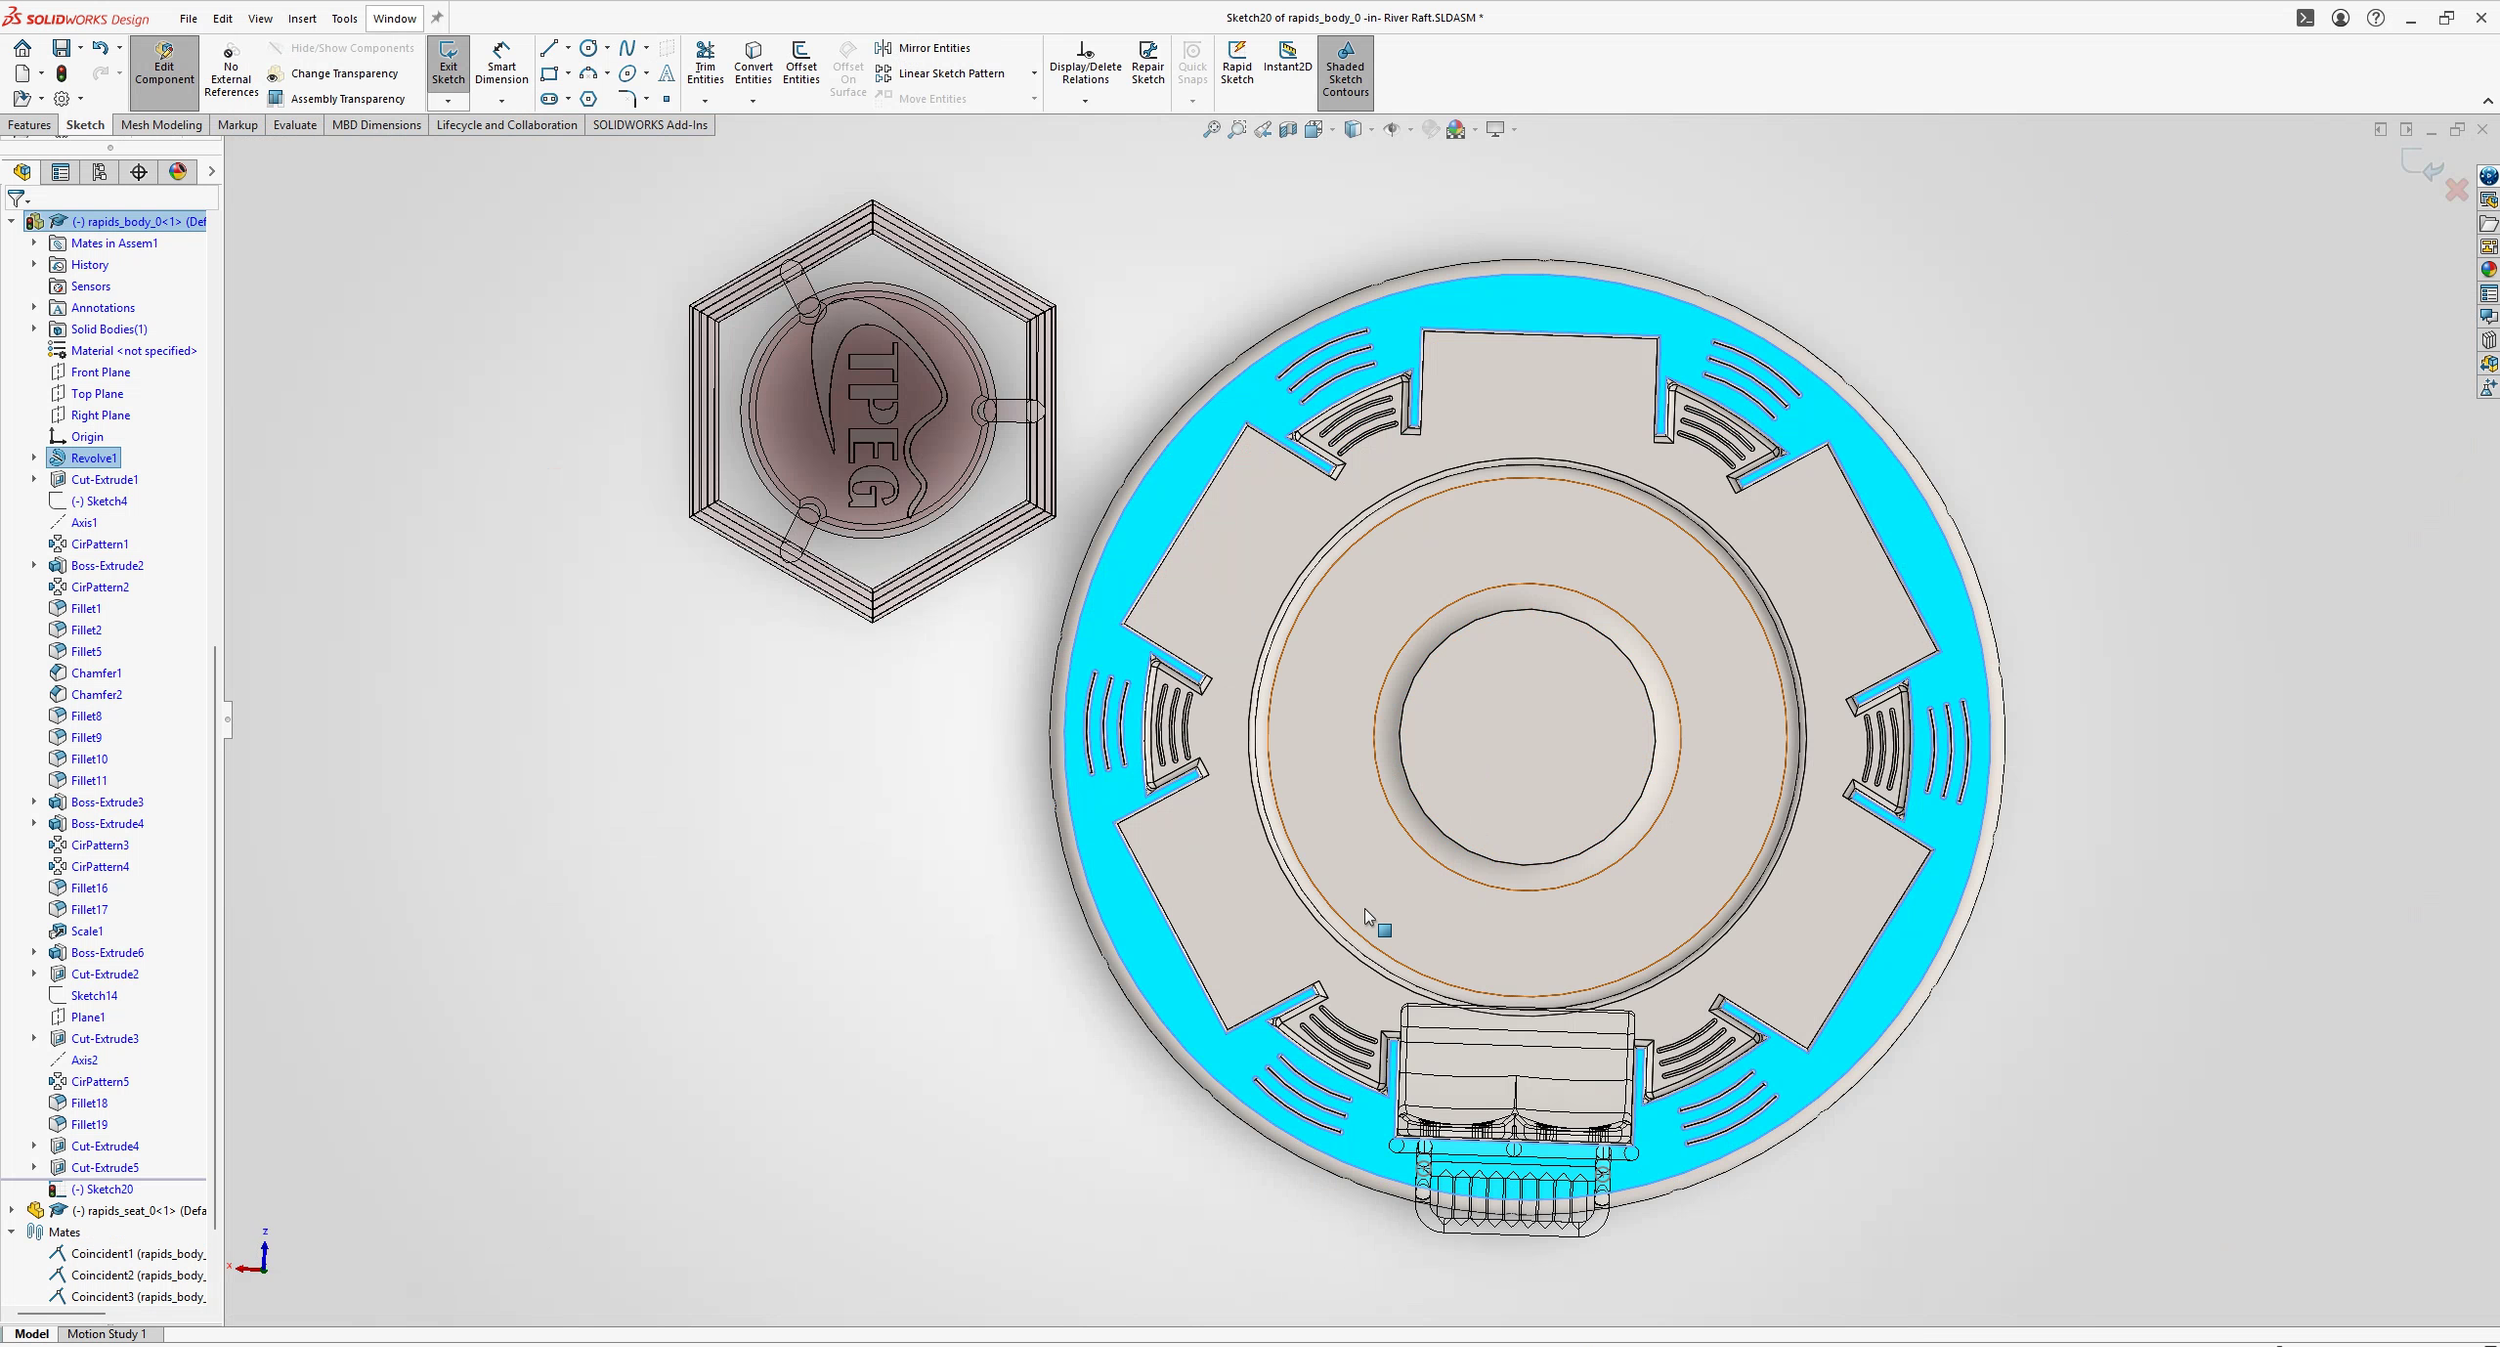
The CAD phase focused on converting a display model into a buildable prototype while using the geometry itself to reinforce theme.
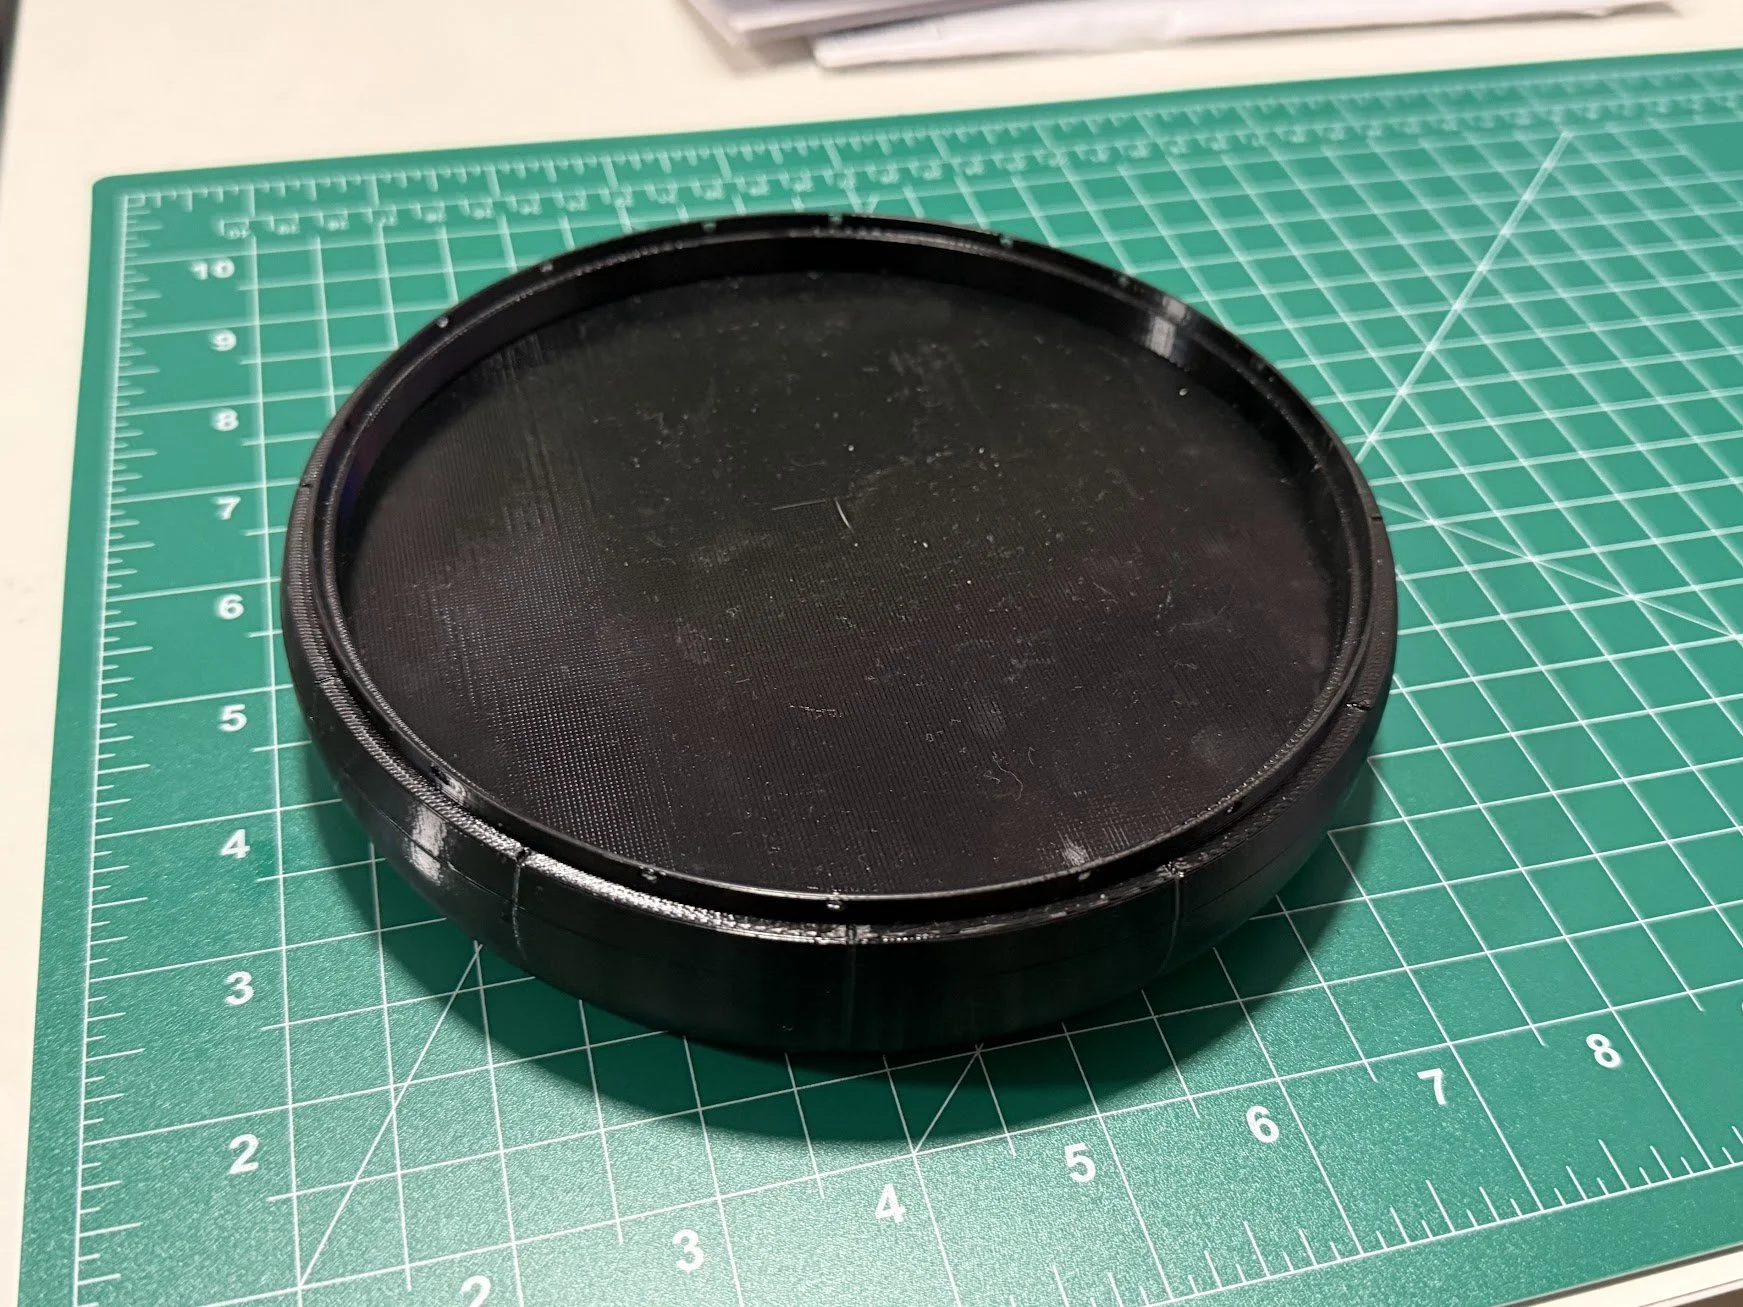
3D Printing / Fabrication Workflow
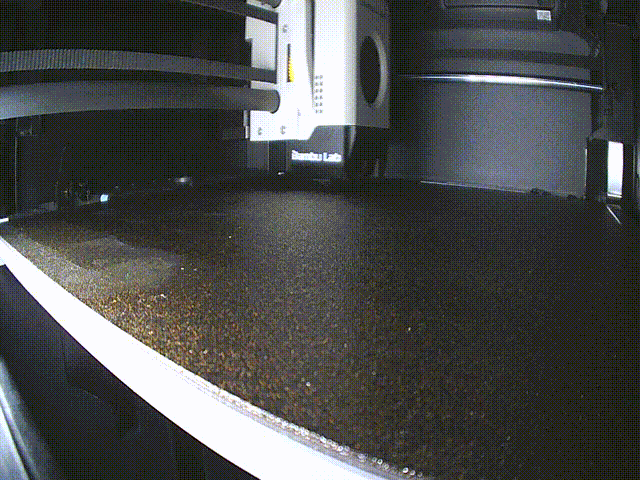
The modified parts were exported from SolidWorks as STEP files, imported into Bambu Studio, and prepared for fabrication on a Bambu Lab P1S.
From there, the models were sliced, arranged, and sent to the printer as separate batches.
Print Specifications
Printer material: PETG filament
Estimated filament used: ~600g
Estimated filament cost: ~$12
Total print time: ~18 hours
Print Breakdown
Main float assembly: ~6 hours
Float insert: ~6 hours
Seats and railings: ~6 hours
The print was intentionally divided into multiple sections to reduce risk, simplify troubleshooting, and allow individual parts to be refined or reprinted if needed.
Physical Prototype and Material Finishing
After printing the structural components, I moved into a physical model-making phase to push the prototype beyond a raw 3D print.
The goal here was to create a stronger illusion of a barrel-like river raft without removing the visible flotation bumper that makes the ride vehicle feel believable as a real rapids system.
Materials used
Thin dollhouse wood slats for the outer cladding band and seat accents
Foam gasket tape to create a cleaner edge transition
Magnets for the removable/rotating center assembly
PETG printed structural components as the base platform
The wood slats were especially effective because they introduced a tactile, handcrafted layer that contrasted with the printed plastic and helped the raft read more as a themed object than a generic model.

Design Reflection
The most important design decision in this project was understanding what not to change.
A real whitewater raft ride vehicle depends on its floating bumper ring, circular seating layout, and central grab area. Removing those elements might have created a more stylized object, but it would also have made the concept less believable as a real attraction vehicle.
Instead, I treated the existing raft geometry as a constraint and layered theme onto it through:
silhouette refinement
surface detailing
material contrast
physical finishing
This approach mirrors how themed entertainment often works in practice: the engineering system remains legible, but the guest-facing experience is transformed through art direction and material storytelling.
That balance between functional realism and themed identity became the core lesson of the project.
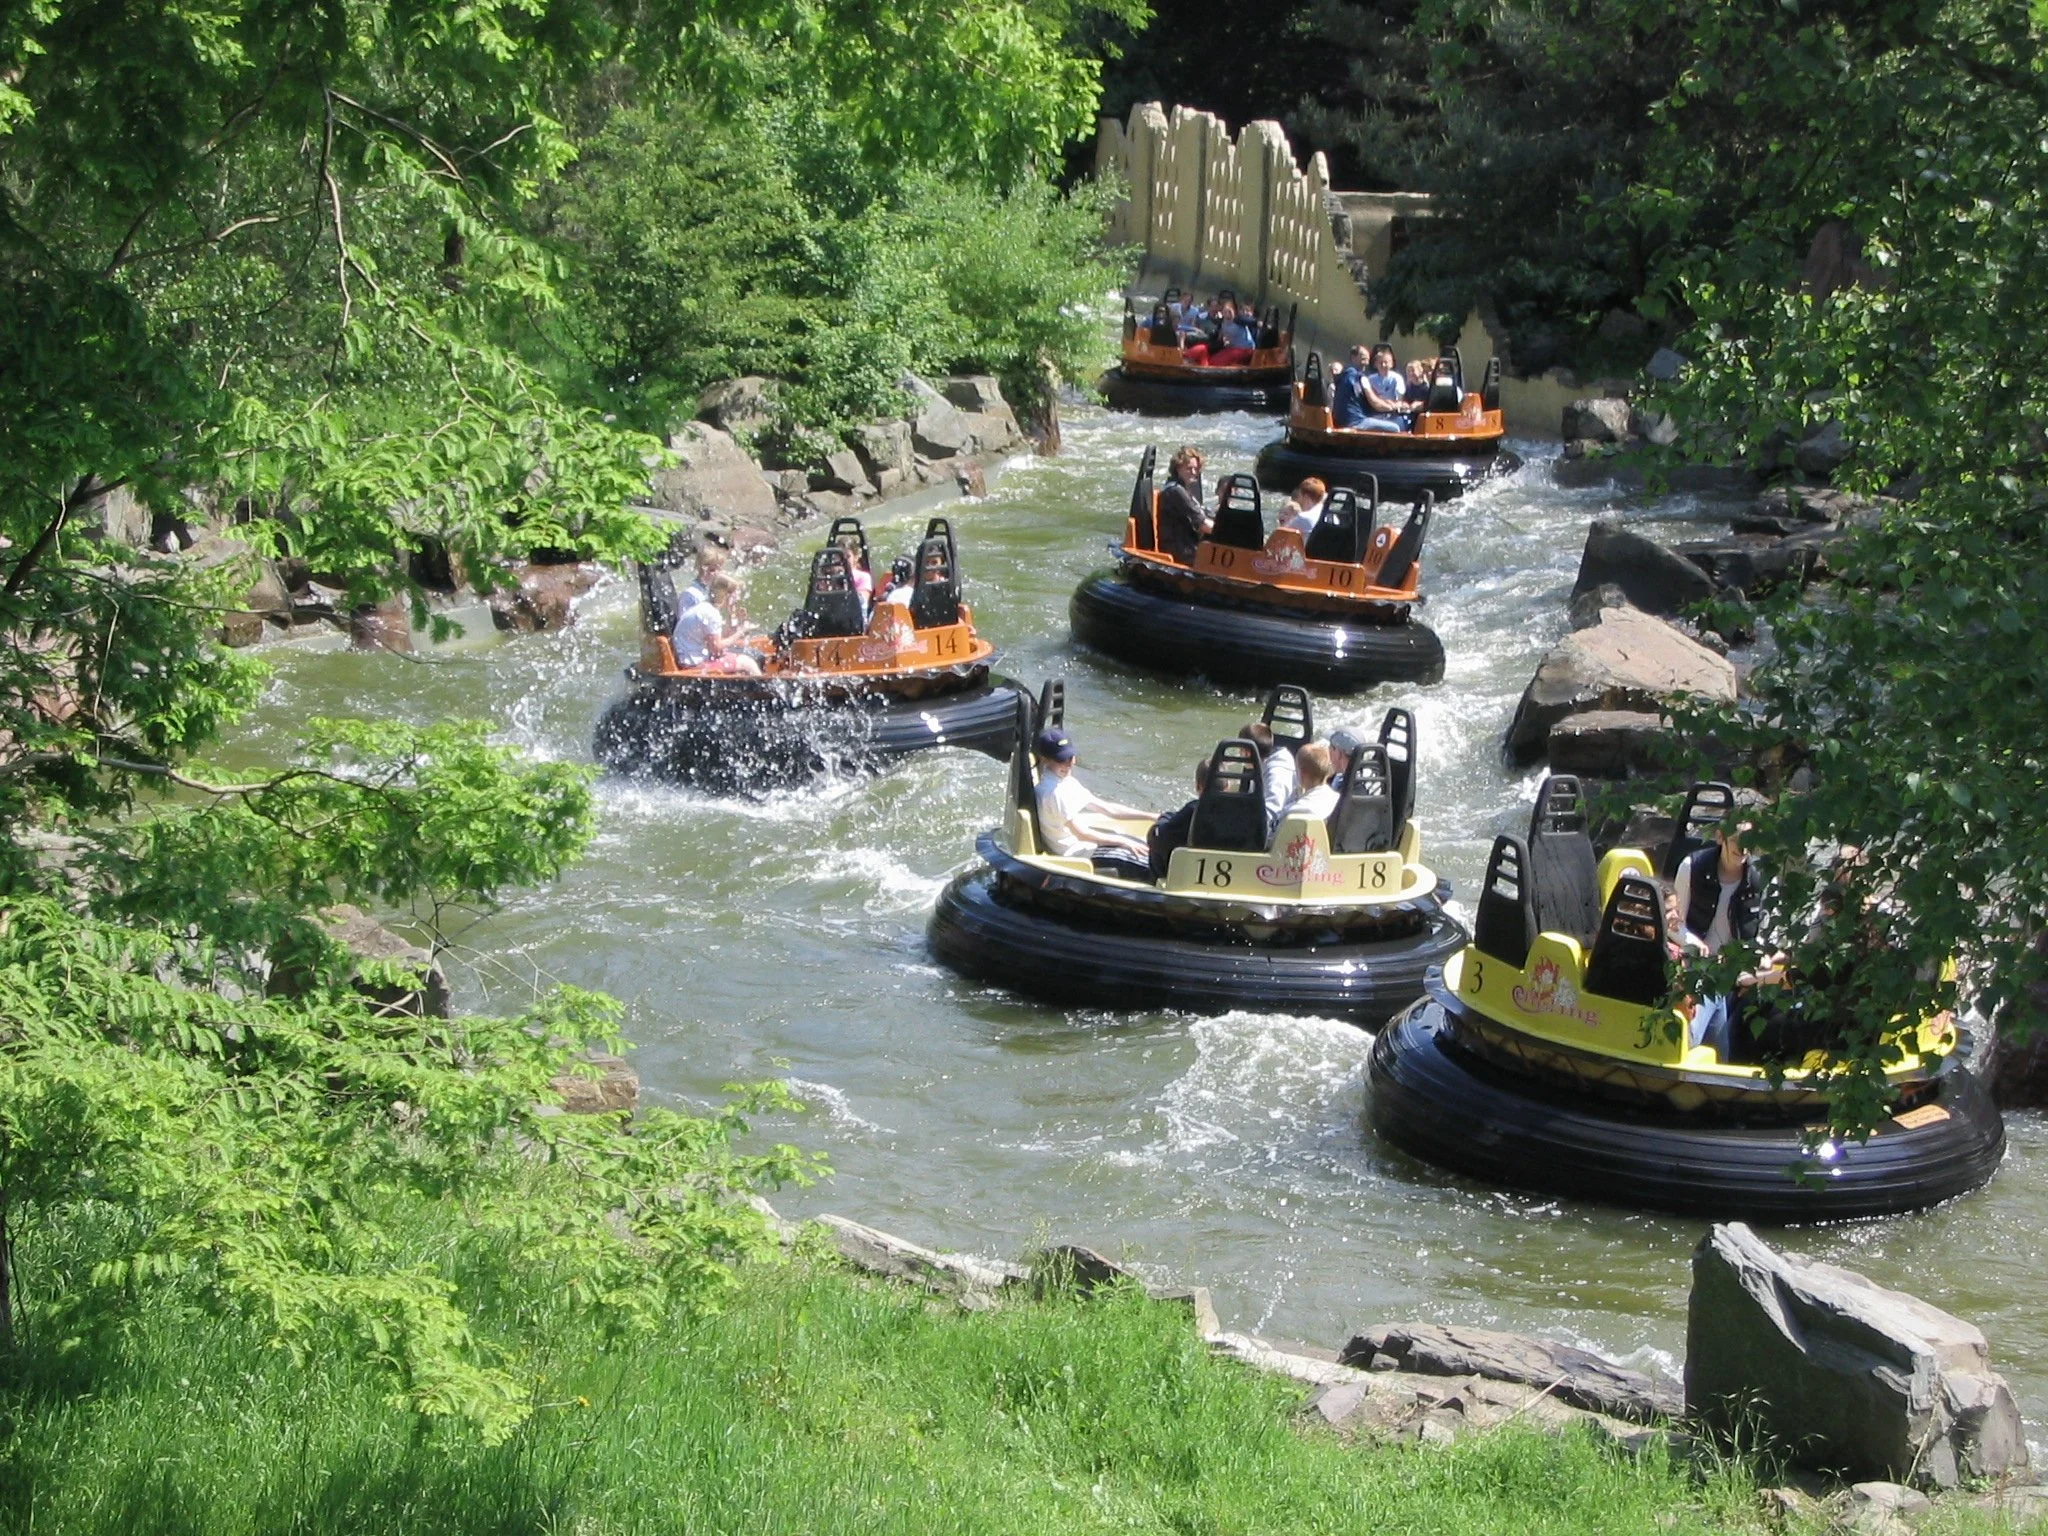
Reference precedent: commercial rapids ride vehicles retain visible flotation bumpers and circular seating geometry, which informed the decision to preserve those cues in the final prototype.
Budget
A. Consumable Prototype Materials
| Item | Full Bulk Cost | Project Use Cost | Notes |
|---|---|---|---|
| PETG Filament (3kg spool) | $60.00 | ~$12.00 | Approx. 600g used |
| Dollhouse Wood Slats (40 pcs) | $15.00 | ~$7.50 | Approx. 15–20 pieces used |
| Thin Foam Seal Gasket Tape | $11.00 | ~$0.55 | Approx. 5% of roll used |
| Small Magnets | ~$8.00 | ~$2.00 | Used in center rotating assembly |
| Adhesives / Tape / Misc. Assembly | ~$5.00 | ~$3.00 | Temporary assembly and finishing |
| Electricity / Printer Overhead | ~$3.00 | ~$3.00 | Approx. 18-hour print cycle |
Consumable Totals
- Full material basket cost: ~$102
- Estimated actual prototype-use cost: ~$28–30
B. Fabrication Equipment (Capital Asset)
| Equipment | Purchase Cost | Usage Allocation | Notes |
|---|---|---|---|
| Bambu Lab P1S 3D Printer | ~$699.00 | ~$5.00 | Reusable fabrication equipment; allocated as a tooling charge |
Revised Estimated Prototype Cost
- Consumables only: ~$28–30
- Consumables + allocated fabrication equipment: ~$33–35
Note: This budget separates consumable prototype materials from fabrication equipment. While the materials used to build the prototype were relatively inexpensive, the actual tools and equipment used to produce it represent a larger capital investment. For that reason, the Bambu Lab P1S is included as a fabrication tool rather than a consumable material. Because the printer is a reusable capital asset, its full purchase cost is listed separately from the prototype material total. For project budgeting purposes, a small allocated tooling charge is more representative than assigning the entire machine cost to a single model.
This budget estimates the cost to build the miniature prototype using commercially available materials. Even though some supplies were purchased in larger quantities than needed, I calculated both full purchase cost and estimated project-use cost to better reflect practical prototyping economics.
Project Timeline
Phase 1: Research & Asset Sourcing
Identify the ride component to develop
Locate editable source model
Evaluate print readiness and limitations
Phase 2: CAD Modification
Repair structural connections
Redesign seat rail attachment strategy
Revise center assembly for cleaner printing
Add themed detailing and barrel-inspired cues
Phase 3: Fabrication & Assembly
Export files to STEP
Slice and batch prints in Bambu Studio
Complete 18-hour print cycle
Test fit and assemble components
Phase 4: Finishing & Documentation
Apply wood cladding and material accents
Add foam edge detail
Photograph final prototype
Compile process, budget, and presentation assets
Key Takeaways
What began as a simple 3D print evolved into a broader study in adapting an existing ride vehicle model to better serve a specific thematic goal.
Rather than starting from scratch, the project became an exercise in evaluating downloaded source files, identifying where the default geometry fell short, and revising those assets through CAD, fabrication, and finishing to create a more intentional and buildable prototype.
The most surprising lesson was how dramatically the ride vehicle’s visual profile changed through relatively modest adjustments. Even while preserving core functional constraints like the floating bumper ring and circular seating layout, selective changes to silhouette, surface detail, and material contrast were enough to create a much stronger themed identity.
In that sense, the project became a study in how thoughtful modifications can create meaningful thematic impact while keeping the underlying ride logic intact (as opposed to a wholesale redesign).